In this blog post, I’ll guide you through creating a Custom Rendering Contents Resolver for use with a JSS component.
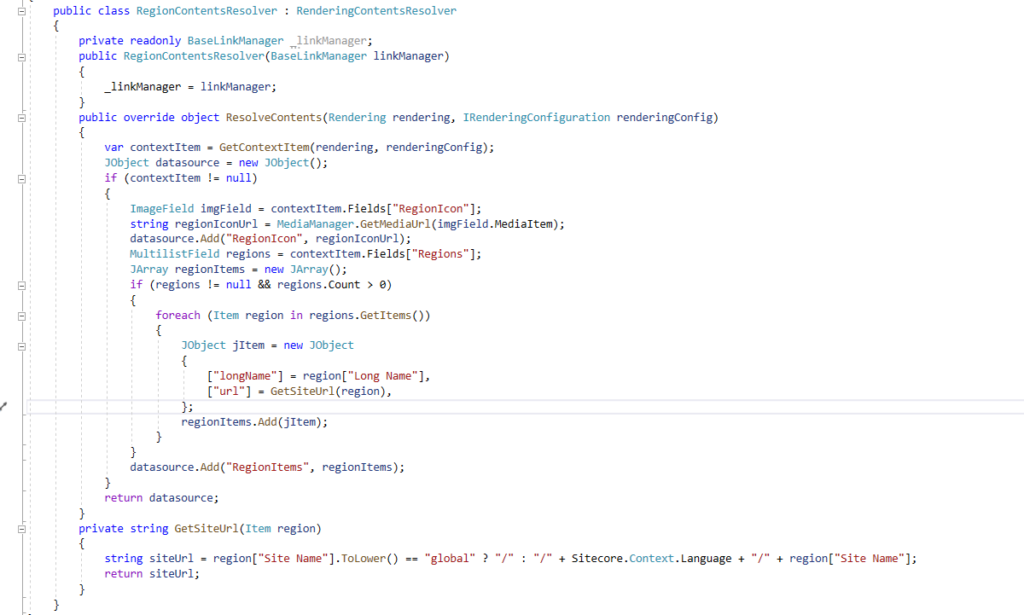
I developed a Region Selector Component with an integrated Rendering Contents Resolver named RegionContentsResolver.
The requirement was straightforward: we needed a list of regions and their corresponding site URLs for a Next.js component.
Here’s how to create a Custom Renderings Contents Resolver:
- Navigate to your solution in Visual Studio.
- Create a Helix project or utilize an existing one based on your requirement.
- Develop a class that extends the Sitecore.LayoutService.ItemRendering.ContentsResolvers.RenderingContentsResolver class.
- Override the ResolveContents method according to your needs. In my case, I retrieved the context item, looped through all region values from a content item field, and constructed an array of regions with corresponding site URLs.

- Build and deploy your solution.
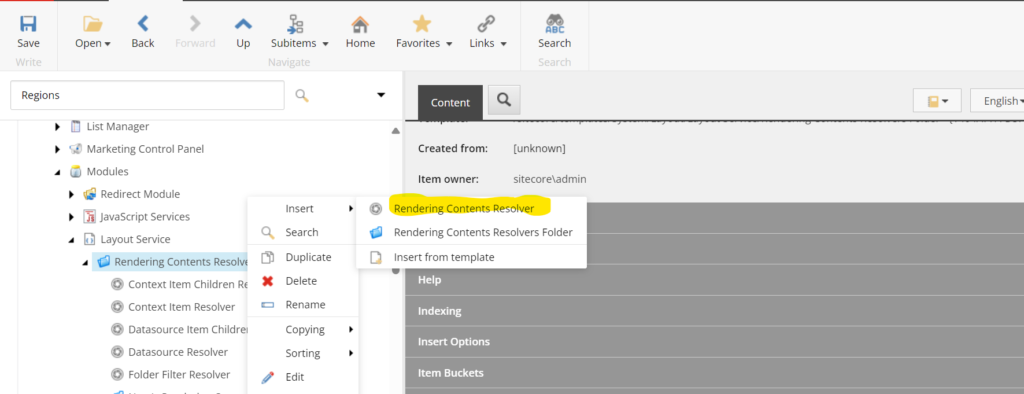
- Log in to Sitecore and navigate to /sitecore/system/Modules/Layout Service/Rendering Contents Resolvers.
- Insert an item using the Rendering Contents Resolver template, named Region Datasource Resolver

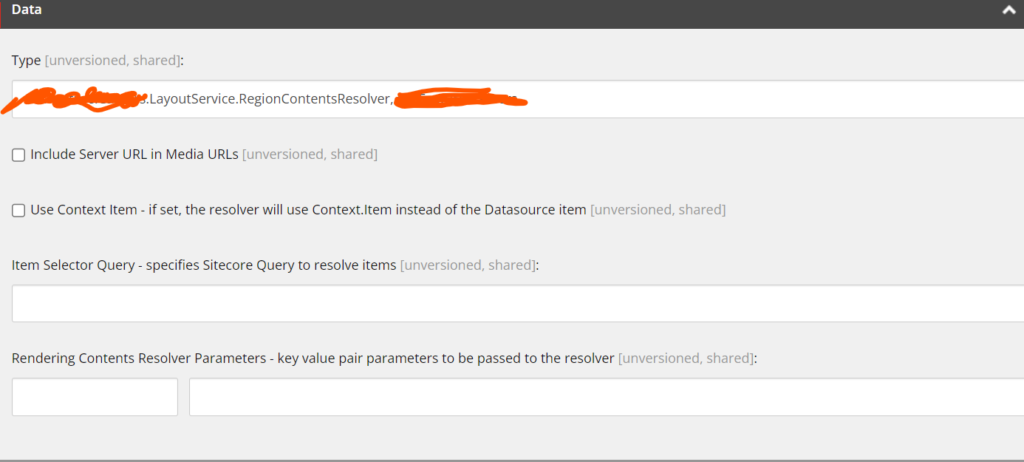
- Populate the necessary field values:
- Type: The full type name of the custom rendering resolver class created earlier (e.g., Project.Feature.FeatureName.LayoutService.RegionContentsResolver, Project.Feature.FeatureName).
- Include Server URL in Media URLs: Set to true for including server URLs in media URLs.
- Use Context Item: Determines if the layout service will use the context item instead of the datasource item (set to true for using the context item).
- Rendering Contents Resolver Parameters: Key-value parameters passed to the resolver.
- Item Selector Query: Query for fetching required items, with optional filtering capabilities.

- Navigate to your rendering item and update the Rendering Contents Resolver field to use the Custom Rendering Contents Resolver created.
- Update the datasource template by adding the necessary fields (e.g., regions).
- Create items and populate field values as required.
- Save and publish to clear the cache.
- Implement the component definition in your Next.js solution and render the data accordingly.
- Save and reload your page to see the changes reflected on the frontend.